
How to Make an Automatic Index in Word.
Learn how to create an automatic index in Microsoft Word with this easy-to-follow guide. Follow our step-by-step instructions to create an index that updates itself as you make changes to your document.
Introduction:
If you’ve ever tried to create an index for a lengthy Word document, you know how time-consuming and tedious the process can be. Fortunately, Microsoft Word makes it easy to create an automatic index that updates itself as you make changes to your document. In this article, we’ll show you how to make an automatic index in Word step by step, so you can save time and focus on the content of your document.

- How to Enable the Index Feature in Word
- How to Mark Entries for the Index
- How to Insert the Index into Your Document
- How to Update the Index
- Tips for Creating an Effective Index
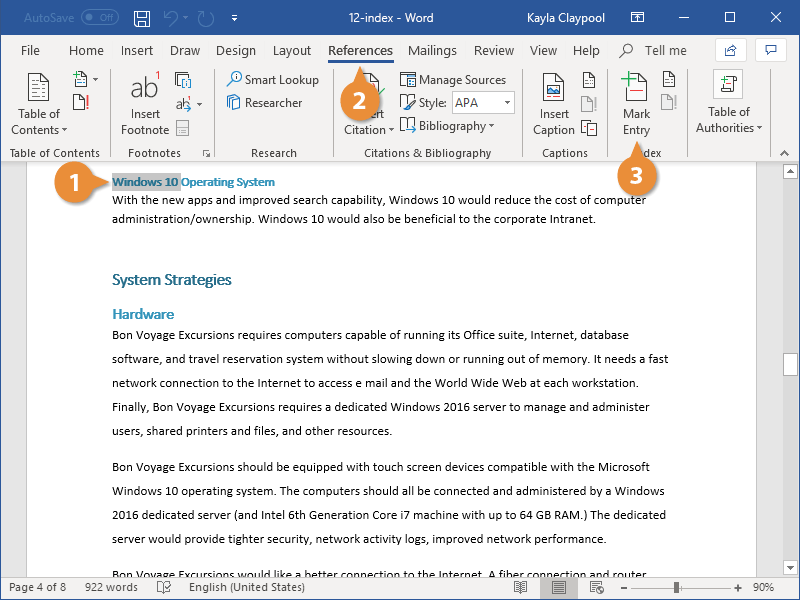
How to Enable the Index Feature in Word:
Before you can create an automatic index in Word, you’ll need to enable the index feature. Here’s how to do it:
- Open your Word document.
- Click on the “References” tab in the ribbon.
- Click on “Mark Entry” in the “Index” group.
- Click on “AutoMark” to enable the feature.
Once you’ve enabled the index feature, you can start marking entries for the index.
How to Mark Entries for the Index:
To create an index in Word, you’ll need to mark the entries that you want to include in the index. Here’s how to do it:
- Select the text that you want to mark for the index.
- Click on “Mark Entry” in the “Index” group.
- In the “Mark Index Entry” dialog box, you can edit the entry text or leave it as is.
- Click on “Mark” to mark the entry.
Repeat this process for all the entries you want to include in the index.
How to Insert the Index into Your Document:
Once you’ve marked all the entries for the index, it’s time to insert the index into your document. Here’s how to do it:
- Place your cursor where you want to insert the index.
- Click on “Insert Index” in the “Index” group.
- In the “Index” dialog box, you can choose the format, columns, and other options for the index.
- Click on “OK” to insert the index into your document.
How to Update the Index:
The great thing about an automatic index is that it updates itself as you make changes to your document. To update the index manually, follow these steps:
- Click anywhere in the index.
- Click on “Update Index” in the “Index” group.
- In the “Update Table of Contents” dialog box, choose whether you want to update page numbers only or the entire table.
- Click on “OK” to update the index.
Tips for Creating an Effective Index:
Now that you know how to create an automatic index in Word step by step, here are some tips to help you create an effective index:
- Use clear and concise wording for each entry.
- Use a consistent format for all entries.
- Include all important topics and subtopics.
- Avoid including too many minor details.
- Use cross-references to direct readers to related entries.
FAQs:
Q: Can I customize the appearance of the index?
A: Yes, you can customize the appearance of the index by choosing different formats, columns, and other options in the “Index” dialog box.
Q: Can I remove entries from the index?
A: Yes, you can remove entries from the index by deleting the corresponding “Marked Entry”